Christmas is an extremely busy time. There’s so much to do, presents to buy, food shopping, house cleaning, a Christmas tree to decorate, Christmas cards to post, preparations for family get togethers and more. It can also be a stressful time. Especially when you have a baby or a young child to think about as well. They tend to get left behind, while you rush around with all the Christmas preparations.
It doesn’t have to be that way though. You can actually have fun with your child and include them in the preparations. All you need to do is to make some time to spend with them. I’m going to show you how to put some fun and enjoyment into your Christmas preparations with your child.
Some of the projects will require support when using tools. Teaching children the skills required to handle equipment safely falls within the Early Years Foundation Stage Guidance (EYFS). They encourage the development of skills by using tools.
Not only will you and your child have fun, but you’ll also be teaching them essential skills to help develop their awareness and more. Also, you’ll be carrying out an extension of what they learn at nursery. Since, they’re taught according to the guidelines of the EYFS.
The Early Years Foundation Stage states that we should “Teach children the skills they need to use equipment safely. For example, cutting with scissors or using tools. Begin to try out a range of tools and techniques safely. Provide a range of tools, for example, scissors, hole punch, glue spreader, cutter, knife and encourage children to handle them carefully. Use simple tools and techniques competently and appropriately. Select the tools and techniques they need to shape, assemble and join materials they are using. The ways that children make things, for example, a child might use a card, scissors, glue, string and a hole punch.”
Now for the fun part. I’ve listed some wonderful things for you and your child to do for Christmas. Some will require supervision. Others will need your explanation, guidance and encouragement to allow your child’s creativity to show.
UNIQUE CHRISTMAS CARDS
Potato Prints Christmas Cards
You can have so much enjoyment preparing for potato printing with your child. It’s also easy and suitable for a toddler to do the stamping. Nevertheless, an older child can be shown how to do most of this activity, with supervision.
This fun project involves using a knife. However, there is a knife for children aged three and above to use that won’t cut their fingers. It’s called the KiddiKutter. It has rounded serration of the stainless blade which makes it safe for them to use.

The KiddiKutter knife is suitable for them to use to cut a potato.
Things you’ll need:
· Blank cards
· Christmas cookie cutters
· Potato
· KiddiKutter knife
· Acrylic paint and paintbrushes
You will need to cut the potato in half and insert the cookie cutter into it. Go about 1cm deep. Then cut a 1cm slice into the potato. Afterwards, show your older child how to use the KiddiKutter knife to carefully cut around the cookie cutter. Then get them to remove the slice and the cookie cutter. They’ll be left with a lovely Christmas stamp, the shape of the cookie cutter.
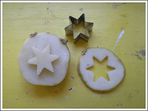
Here is an example of a star stamp that’s been cut out of a potato:
Here is an example of a star stamp that’s been cut out of a potato:
Give your child the paintbrush and some paint in a plastic container. Show them how to cover the stamp with paint. Make sure they use the brush to cover it evenly all over. For a toddler, you might have to paint the stamp for them. It depends on how advanced they are.
Finally, let them stamp onto the blank cards. They can experiment with different colours, or mix colours together to get an unusual effect.
Marble Print Christmas Cards
This is a fun way for your child to use different skills and produce beautiful Christmas cards. You supply the resources and they can do the rest themselves. All you need to do is show them or explain to them how to do it.
Things you’ll need:
- Blank cards
- An A4 Sheet of paper
- Red and green tempera paint in a plastic cup (red & green paints are the traditional Christmas colours)
- Scissors
- A large box or plastic container
- Glue stick
- Masking tape
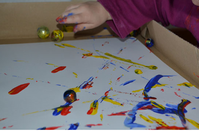
Put the sheet of paper into the box/deep plastic container and use masking tape to secure the edges. Get your child to drop the marbles in the plastic cup with the paint. Next, put the marbles covered with paint into the box/plastic container and roll the marbles across the paper. Then get them to drop some paint on the paper in the box and roll the marble across the paper, by tilting or shaking the box. Leave the paper to dry.
To make the Christmas cards, let your child cut out shapes like stars or triangles. Finally, they should stick the shapes onto the blank card using the glue stick.
These unique handmade Christmas cards can be given to their nursery teachers and family members.
Baby’s First Finger Painting Picture
The first Christmas for your baby should be one you both remember. What better way to do that than to let them finger paint a picture.
Your baby’s work of art will also develop fine motor and writing skills. The EYFS Guidance states these are some of the “Ways in which children begin to develop fine motor skills, for example, the way they use their fingers. Encourage children to handle and manipulate a variety of media and implements, for example finger-paint and brushes.”
This is a great chance for them to experiment with different colours and develop their imagination. Although you’ll be making the paint for your baby, they should be encouraged to do the finger painting by themselves.
“Encourage babies to make marks in paint or with thick crayons. Provide opportunities for children to sometimes use all their fingers or the whole hand, for example with finger-paints or cornflour, and sometimes use just one finger, for example when making patterns in damp sand or paint.” ~ The EYFS Guidance
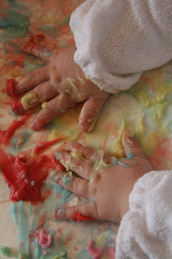
Babies instinctively put everything in their mouths. Therefore, the paint they use has to be safe. The safest paint for babies are edible ones made from vegetables and fruits. This activity is suitable for babies from six months old.
Things you’ll need to make the paint:
· Carrots for the orange paint
· Broccoli for the green paint
· Strawberries for the red paint
· A food blender
· Saucepan or steamer
· Vegetable peeler
· Baby’s high chair
· Sheet of paper
Cut the carrots and broccoli and put in a steamer or saucepan, separately. Cook till they’re very soft. When cooked, put each in the blender and blend until the vegetables are smooth. You might need to add some water to get the vegetable to form into a paste.
Add the strawberries to the blender with a small amount of water. Blend until smooth.
When the paint is ready, put some on your baby’s high chair. Encourage them to explore and have fun with the different colours. To make the picture, get a sheet of paper and put it on the high chair. Let your baby paint on it using their fingers. After they’ve finished, you’ll have their first painting ready to frame for a Christmas present. Or a keepsake to remember their first Christmas.
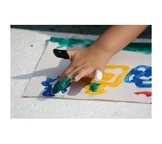
For toddlers and young children, use the method below to make the finger paints. Supply them with a sheet of paper. Let them be creative and come up with their own masterpiece.
Things you need:
· 1 cup of corn flour
· 1 cup of cold water
· 3 cups of boiling water
· Liquid food colouring
· Sheet of paper
Add 1 cup of cold water to the corn flour and mix together in a bowl. Slowly add the boiled water to the mixture of corn flour and mix together. Transfer to a saucepan over low heat. Stir until the mixture is smooth like custard. Add some liquid food colouring to colour the paint. When the paint cools down, store them in clean jars ready for your child to have fun with.
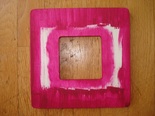
Another idea for an older child is to get them to decorate one or two photo frames.
Buy inexpensive plain wooden photo frames. You can find these in a Pound shop. While you’re there, pick up some sparkling decorations. Or you can buy some from your local craft store. You also need a few different colours of non toxic paints and non-toxic glue. Remove the glass from the frame. Let your child paint the frame. Put it on newspaper to protect your surface/table. Encourage them to be creative by painting it the way they want it to look. After the paint dries, show them how to decorate the frame using the glue to stick down the sparkling decorations. Finally, put a recent photo of them in it. This will make a beautiful present for their grandparents or other family members.
Lovely Christmas Tree Decorations
When you’re out walking, why not collect some pine cones together. There should be lots of them on the ground. Take some home and wash them.
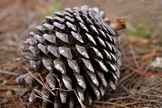
Give your child some coloured glitter glue. The ones in tubes will be easier for them to use. They should use the glue to paint the pine cones with lots of pretty colours. Then leave them to dry.
Afterwards, get them to tie a piece of cotton or coloured string to make loops at the top of the cones. It will put a smile on your child’s face to see their lovely work of art displayed on the Christmas tree. That will be their contribution of beautiful handmade decorations.
Click on this link to download some lovely blank Christmas tree decorations. Print them off on card. Get your child to use some crayons to colour them in. Next, they should use a pair of safe scissors to cut them out. Then give them a hole puncher to make a hole at the top of each. Finally, let your child string cotton thread or coloured strings through the top, then tie a knot and hang them on the Christmas tree.
· Ideas for Christmas presents for your child
There’s so much to choose from. If you’re working you probably don’t have much time to shop for presents. The Croydon Advertiser listed some places where you can buy affordable presents online.
· Click on this link and check out the presents for toddlers.
· This link is for the older child.
Use this period before Christmas to make your baby or child feel loved and appreciated. It’s a special season when all the family gets together to celebrate. So, don't forget to share with the family what you and your baby or child did together.
 RSS Feed